Thursday, November 1, 2018

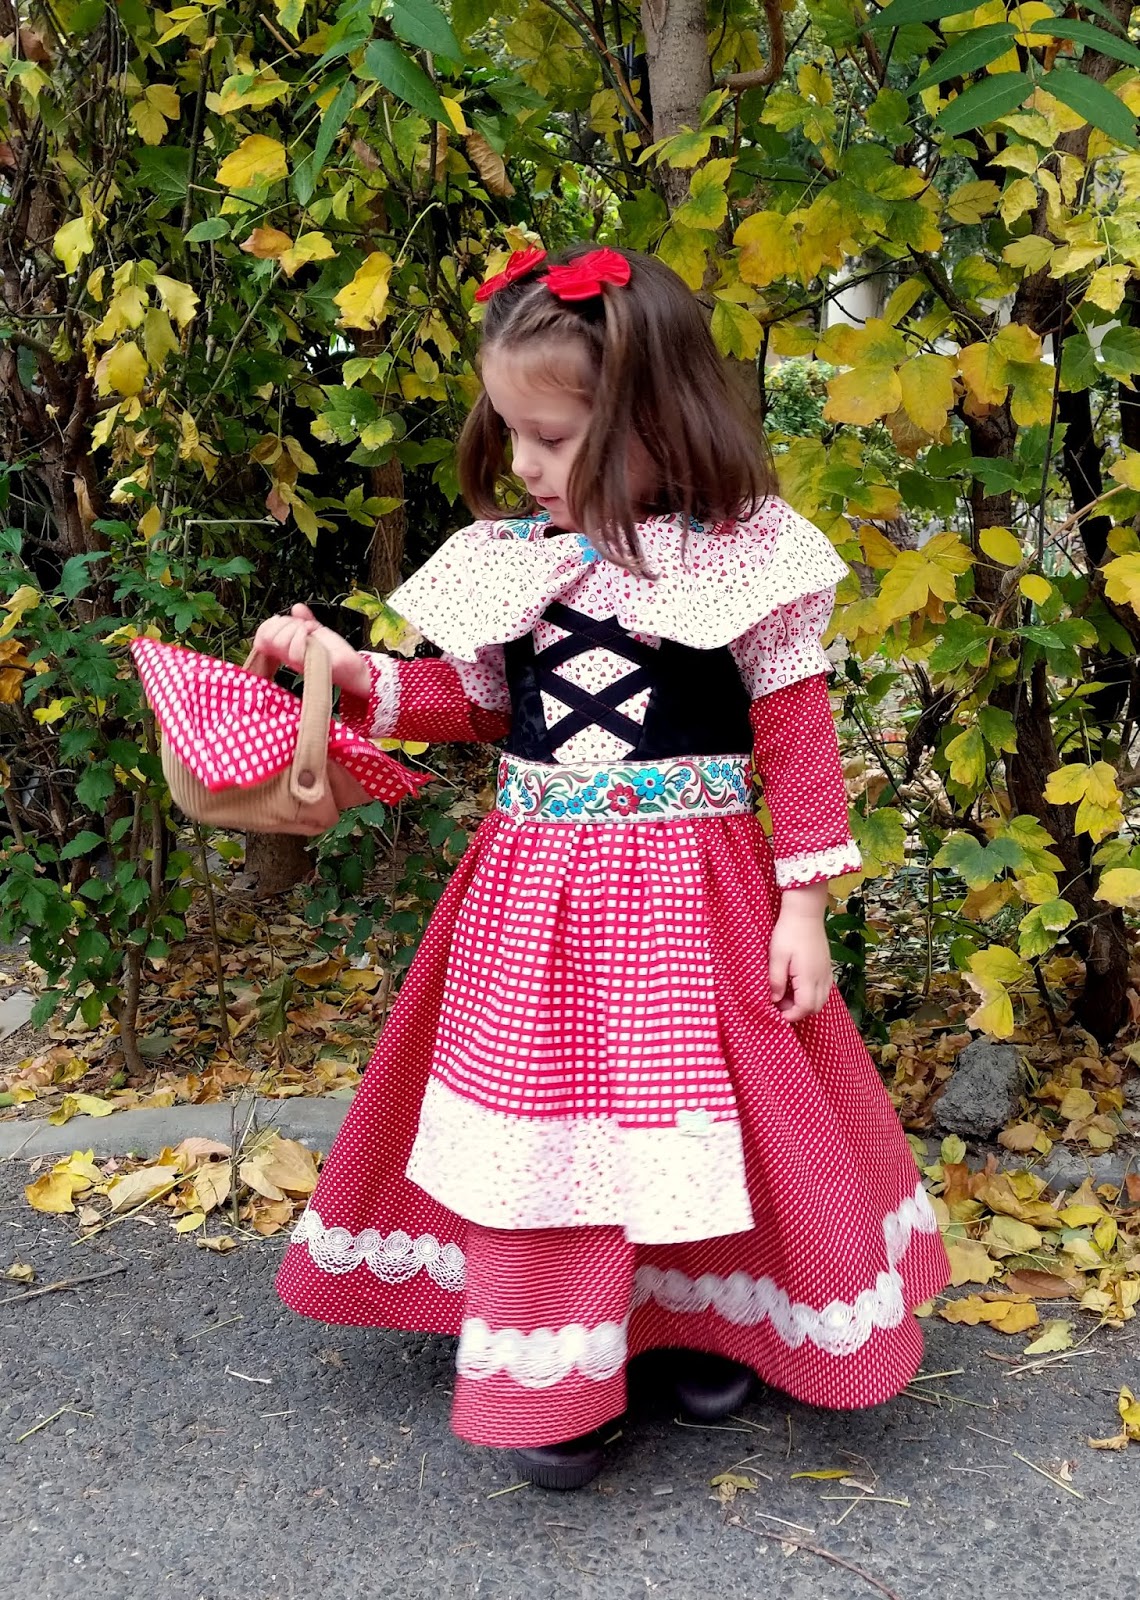
Happy Halloween! - Little Red Riding Hood for my little girl!

After doing Andrei's costume this year Eva asked me every day last 2 weeks when will her costume be ready! I had this little red riding hood idea and she loved it as she loves the story and often plays Red with her toys but I had so little free time lately and this pattern had a lot of pieces and fabric to juggle! If she had not been so insistent I don't think I would have made it!
  She need it this morning and I was up till 3 AM last night sewing it! She insisted I put her to sleep and not her dad and I told her that if I do that I might not be able to finish her dress! When she got up in the morning and her dress was ready she was so happy that the fairies come by last night to finish it!
  I used McCall's 7546 pattern for it:

The hood is rather simple and quick but the dress took quite a bit of effort!
Various red fabrics from my stash (quite proud of myself of not going fabric shopping for this one even if my fabrics didn't coordinate perfectly like I want them to)! Mostly cotton! And a few white trims left from my sister in law wedding dress sewing! I used embroidered cotton batiste for petticoat:
   I did wider straps for more coverage and add an embroidered flowers trim over it to make it a little different! Used the same trim as waistband as well!
   Added the long sleeve addition from another view as the weather is not exactly warm at this time of the year! used some white lace at sleeves hem.
   Trying to make my own florence for the neckline with the pattern piece from another view but I don't quite like the end result here - a bit too wide and stiff...
   I added horsehair band in the skirt hem so it will get a bit more volume less chances she will step into the skirt while she walks!
    She is so precious in her new costume:
Sewing 129 - Shopping 125.

Wednesday, October 31, 2018

Happy Halloween! - Grim reaper costume for my son!

Halloween is not big here. It is an imported holiday and is just commercial and superficial ... but there have been a few events for kids on kindergarten and school and dressing up is so fun for the kids. Previous years I got by with store outfits but this year I asked Andrei what he wants to be. His answer was Slender Man and took me by surprise. I was not quite aware that he was over superheros! I told him I don't think I can put together a slender man costume in less then a week and asked him to keep thinking and showing him options I could buy! He rated almost all the costumes available as childish and didn't got much interest in any untill from search to search he got to some adult grim reapers and zombies costumes with nice make-up and then his face light up, literally! So considering what he liked and what I thought I could do in a short time frame he choose to be death! There were some cheap satin robes I could buy but they all look so cheap and ill made and unattractive! So I decided to make the robe myself!
   I considered a few robes patterns but none looked exactly right to me. Even if I had little time I lost a lot of it choosing a pattern and a fabric!
  In the end I decided to draft the robe myself starting from a hoodie pattern from Ottobre. I just love the front cross over hoodies they have - looks stylish and covers the neck nicely:
I changed the shape of the hood to trail on the back a bit and slashed the sleeves for more drama. I went for a A-line maxi dress with it and the heavy twill I choose was so so perfect for it! I could not believe how well  it draped in this fabric and how reached it looked compared to the cheap satin ones!
To make it a little different I added black and white striped batiste lining to the hood and sleeves! Great effect!

I bought professional latex makeup for him but his party at school started very early in the morning with his classes and also thought he might to be comfortable with all that makeup so on the last minute replaced make-up with a cheap plastic mask he could take off at any moment. We trayed some latex masks as well who were better looking but he could not stand them over his face! It was nice that his hood covered the neck as well! I also got him a pair of black latex gloves and a skulls necklace! He was pleased with his outfit! And so was I!
I had bigger plans to add some bloody hand embroidery to the robe and a few other creepy elements but never got around to do it! I took great pleasure in seeing how nicely the hood, the shoulders and everything was actually fitting him.

Friday, August 31, 2018

Easy burda beach dress and a gathered skirt

There were many beach dresses in burda I wanted to try over the years but never go around to trace any of them... probably because the big pattern pieces and huge fabric requirements were scarry. This summer I finally bought 2 burda issues after a long break and seen this design made and looking spectacular on others so decided to give it a try:
It was nowhere near as glamorous on me. I made the smallest version but was still drowning in it.I didn't had enough fabric so I made it shorter out of necessity but because the dress was designed for tall people it didn't looked shorter on me. Maybe for the same reason I hate that the bat sleeves end on my hip rather then my waist as I think it should. I cut down a bit of the sleeves fullness and added a patch pocket. I had to really push myself to finish it as the 1st try out was a big let down.
When we returned from the seaside I had the inspired thought to ask my mother in law if the wants to try it and even if the is several numbers bigger then me the dress was fitting her and looking way better then on me. So in the end I was quite happy to have someone wanting it.
  I had so little time in energy lately for sewing but when my sister was visiting me one evening and said she wanted a simple gathered skirt I could not resist the temptation to get rid of one my stash fabrics:
I used zig zag over the elastic waistband to make sure skirt will stay even spread at all times. I used the waistband only large enough to pass the hip not the full hem size to reduce the bulk. That took a bit of extra time to first and sew the 2 pieces together. The skirt has 2 panels but I managed to make the side seams pretty invisible!
  I also got a picture of a simple Lekala 4177 white top i made my mother in law this spring:
I could not resist some fabric shopping lately so Sewing 126 - Shopping 112.

Wednesday, August 8, 2018

Summer blues - a great match StyleArc amber top and BurdaStyle raglan sleeve with tie

Like I said before sewing The StyleArc amber top is quite addictive and it require little fabric so it a great option for busting a few smaller 1 meter cuts.
So while I was flipping through my stash looking for fabrics I got my hands on this beautiful rayon I ordered from China on AliExpress this spring. It had a really nice feel to the touch and I really loved it. I think they still have it in stock here and it is free shipping if you don't mind waiting a lot for it to arrive. In Romania any import under 10$ or so is free of import taxes for I only ordered one meter.
   I was a bit disappointed when it arrived because the colors were a bit darker then the picture they posted - that white is more ivory and the blue is darker than this. I  also was under the impression the print will be larger than it was but still it is a lovely fabric with a great feel and a color scheme I just love. So seeing it I immediately thought this will make a perfect amber top but I wanted some interest and the blocking offered by the pattern was not what I was looking for. I felt this top needs some interest in the sleeve and that front and back needed to be left alone just to showcase the fabric.
   The design 119 from burda 07/2018 already got me intrigued but seeing the lovely top Ellen made convinced me I really need to try this sleeve so I traced the 3 pieces for sleeve from Burda:


The front of the sleeve fit in with the style of arc top without any issues ( size 8 on the top and 36 on the sleeve). As the back in Burda is a really low cut the back sleeve didn't fit in with the back top so I had to improvise and add a small triangle of fabric to the sleeve to match the back as well.
If I will make this again I will used the style arc sleeve for the upper part and just lengthen that with the burda piece instead of using the full burda sleeve like I did.

I really love this blouse and I think will be in heavy rotation:
Sewing 123 - Shopping 99.